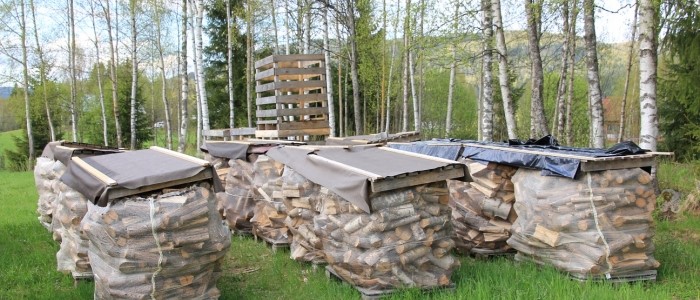
Mankind have been successfully drying timber for thousands of years, long before the advent of modern dry-kiln technology.
While often presented as a difficult task, with just a few precautions, it’s not that difficult to achieve your goal. In this guide, we’ll lay out some sound advice on drying timber yourself.
The two most popular ways of drying your own timber is by kiln or in open-air.
Air dried wood
Air dried wood contains much less moisture than green wood, but a little bit more than the faster and more aggressive method of Kiln drying. It’s this moisture content that makes it a little easier to work with than the Kiln dried alternative. Air dried wood is a solid, stable medium for construction projects such as furniture, as it’s easy to work with and does not go through the kiln process, which can cause damage to the wood.
Air dried wood is a much better alternative to green wood when it comes to fuel. The long weathering process helps to eliminate moisture and other elements, making it a much more efficient and safe fuel.
Kiln Dried Wood
Without a kiln, you should try to achieve an air-dry moisture content of 15-20 percent. Further moisture reduction occurs when you move the boards indoors where they’ll eventually reach their equilibrium moisture content (EMC). (Note: The EMC equals a point where the wood neither takes on nor loses moisture due to the atmosphere.)
Kiln Dried wood is the industry standard for construction. It is the most consistent and stable product offered after the drying process.
Smaller woodworking projects, such is with chisels or on the lathe may want to consider using air dried wood as kiln dried wood can be unforgiving and hard on tools.
According to the U.S. Forest Service’s Forest Products Laboratory in Madison, Wisconsin, it takes 1-inch thick green boards from 45-60 days to air dry to 15-20 percent moisture content in sunny, temperate, not-too-humid weather. If you live where it’s colder and damper, count on more time. Inside, the drying process can prove slower, taking three or four months before the wood reaches its EMC and can be worked. But achieving workable stock means starting with a proper stack.
Storage
Finding a good spot to store your timber is half the challenge. If you’re lucky enough to have a decent outside area, you’ll want to pick a space that’s in the open, to ensure good ventilation but avoid low, damp or boggy areas. Also ensure that there’ll be no debris or falling leaves e.g. under a tree. While you want to keep your timber as dry as possible, don’t pick a spot in direct sunlight – you need to get the balance just right.
Alternatively, if you have to dry your timber inside, pick and well ventilated room.
What else?
Drying your own wood can easily be achieved if you follow this simple advice:
- Be sure to level the stack’s foundation, but provide for a slight drainage slope
- Select only straight-grained, defect-free boards – ideally, they should be no thicker than 2″ and less than 12″ wide
- Check the stack occasionally. Stains or mildew signal drying too slowly. Excessive checking means drying too fast
- Check the wood every few weeks for moisture content
And you?
If you’ve got any top tips drying your own timber, share your advice with us on Facebook or Twitter – we always love to hear from you.
And if you’re looking for timber you’ll want to take a look at our fantastic product range today.
