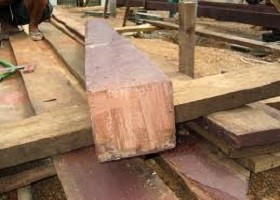
As many home and business owners strive to be more environmentally-friendly, reclaimed wood products are becoming increasingly popular. What many fail to realise is how important preparing reclaimed wood is to getting the most out of it.
In this guide, we’ll take you through the how to properly prepare your reclaimed wood for its next role and how you can put it to good use.
Step one: Inspecting/cleaning the wood
Many items of reclaimed wood can be in a pretty sorry state, but they can usually be brought back to their original glory with some love, attention and just a few adjustments.
Firstly, you’ll want to give the wood a good clean and this can easily be achieved with a basic washing detergent and a toothbrush or handled poly scrub brush. You’ll also want a pair of latex gripping gloves – as not only, as the name suggests, will they help you get a good grip of the wood, it’ll save your hands from inevitable splinters too.
After you’ve scrubbed the board, make sure to rinse thoroughly to get rid of the soapy residue, so it won’t stay damp for too long.
Washing the wood is best done outside on a dry, sunny day. That way, the sun will do most of the drying work for you. You don’t want your wood to remain wet for a long period of time, because mould loves moist conditions, so you’ll need to identify a good place for the wood to dry. Those craft-lovers among you may like to improvise by using concrete blocks and wood as a drying rack.
Step two: Preparation
The next step is preparing the wood/boards for any machinery work such as a jointer/planer.
Further inspection is needed to ensure it is metal-free. While removing nails or tacks is completely optional – you might be going for that rustic look – any metal in the wood can damage the blades of a machine.
A hand sander is a great way to find any last bits of metal you may have missed by eye – look out for any shiny dots or you may hear a metallic ‘clink’ sound when the sander hits the metal.
Other problem areas to look out for are cracks, loose knots and rotten wood. It’s especially vital to extricate rot, since this can be akin to cancer for wood – spreading quickly and undermining the stability of your timber. You’re not going to want to plane any boards that have signs of these above, as they will look unsightly and won’t be stable.
Next, ensure the wood planks are even – if they’re not, the best way is to cut the ends off the boards. This will help to feed it into the planer in the next step.
Step three: Machine-work
Machinery, such as a jointer or planer, is a great way to fix any imperfections in reclaimed wood.
A jointer is used to make the face of a warped, twisted, or bowed board flat. After the wood/boards are flat, then the jointer can be used to straighten and square the edges.
After flattening, a planer can be used to ensure the wood is of equal thickness from end-to-end.
To do this, measure the width of the board and adjust the planer appropriately. The planer needs to be set slightly wider than the board so the wood can slide right through. For example, if your board measures two inches, the planer should be set for 2.125 inches.
Always send a practice board through first and that way, you can adjust the machine accordingly – a little bit at a time. You’ll want the machine to take off just a little bit of wood off the board, to ensure a smooth and even finish.
Some wood may require to be put through a second or third time, because all planers have limits to how much wood they can remove in one pass. And if you have multiple boards that need to be the same thickness, you should pass all of the boards through at the measurement of the thinnest board.
What’s next?
Now your reclaimed wood is fully-prepared, there are a wide variety of ways it can be used. Most popularly used for home furniture such as coffee tables and cabinets, reclaimed wood offers a unique look that not only has stood the test of time, but has a history that can’t be matched by buying new.
But what about you? Have you recently used reclaimed wood in one of your projects or want any more information on how to prepare it? If so, let us know via Twitter.
And if you’re looking for the right timber for your next project, be sure to check out our fantastic product range at International Timber today.
Images used courtesy of Wikimedia Commons
