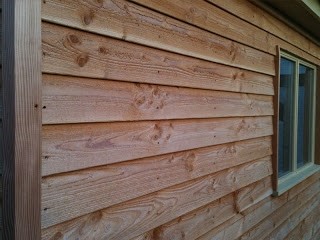
Timber cladding is becoming increasingly popular for replacing brick or rendered finishes as a warm, practical and sustainable product – but with so many options out there, how do you get it right?
Often the process of selecting the right kind of species and the final detailing can be a little off-putting, so in this guide, we’ll explore how you can perfect this process and ensure you pick the correct timber for your project.
Which timber?
It’s recommended that a durable timber species is used for cladding with a heartwood durability rating of between one (being most durable) and three (moderately durable), in accordance with the Individual Standards.
Western red cedar, European larch, European oak and Douglas fir are among the most popular species to use in cladding as they don’t require any preservative treatment, because they’re naturally resistant to insects, moisture and rot.
On the other hand, species such as spruce, fir and pine have to be treated. This involves impregnating them with chemicals such as boron, which helps stop decay and increases its resistance to fire.
While softwood cladding is one of the cheapest, costing around £5-8/m2, if left in its raw state, it can deteriorate very quickly. Therefore, it requires regular painting and staining – roughly three coats of stain is needed when first installed. So when this additional maintenance is taken into consideration, softwood is not necessarily the most cost-effective. This makes those species that require no staining or treatment, as mentioned above, much more appealing.
However, it’s important to note that the sapwood content of timbers is non-durable, irrespective of species, so if present (open to the elements), it will need preservative pre-treatment.

Assembling
When it comes to assembly, if you’re dealing tongue and groove (T&G) cladding, the grooves must be faced down to avoid holding water.
In non-profiled timber cladding, for board-on-board use, any sapwood present should be placed at the rear of the cladding to maintain the natural durability of the wood.
Typically, horizontally-mounted boards are preferable to vertically-mounted ones, as they produce greater resistance to moisture penetration. If you do use vertical weatherboarding, however, the overlap should face away from the prevailing wind. And in either case where the boards overlap, they should do so by at least 30mm.
In terms of installing, the cladding boards are fixed to battens, which should ideally measure 50mm deep and be spaced at a maximum distance of 600mm centres. To ensure stability, each board needs to be attached to at least three battens.
The devil is in the detail
With timber cladding, it’s essential to get the corner details just right. Not only will this look aesthetically pleasing, it will ensure moisture will not seep behind the boards, which can lead to damp issues – and in worse cases, rot.
The best way to deal with corners is to assemble a length of timber, which has been cut into at the back to form a V-shape that fits over the corner. The boards then fits snug into this piece of timber, where they meet the corner.
Mitre-cutting the boards ends (where both sides are cut at an angle of 45 degrees) at corners isn’t recommended, as natural movement of the timber will allow the joint to open, causing failure of the surface coating and enabling water to penetrate. You also need great accuracy in measuring and sawing. If you do decide to use mitre-cut boards, it’s advisable to provide a gap (about 2mm) between any adjoining surfaces, to allow for expansion.
Internal and external corners are more easily detailed on vertical boarding. These can be joined by ‘tonguing and grooving’ to give added stability and protection.
Moisture matters
Timber can deteriorate quickly when used outside without a protective coating, as it is exposed to sunlight and moisture. As the moisture content of timber used externally for cladding often exceeds 20 per cent, it may need to be treated with a preservative.
Additionally, a moisture gap (or cavity) behind the cladding is one of the most important steps in the cladding installation – we’d recommend a minimum of 10mm gap at the fixing surface. The purpose of this cavity is to ensure air circulation behind the boards, which prevents a build-up of moisture that would otherwise compromise the durability of your cladding and may result in discolouring/staining the timber.
Finishing touches
When assembled correctly, the next step would be to add any preservatives or treatments, if required.
Although some hardwood cladding can be left untreated, when installed, it can be oiled to further enhance its durability and life.
However new technology has reduced the need to add preservatives. For example, heat treatments, such as Thermowood and wood-modifying processes, like Accoya, have introduced a new range of softwood products that achieve greater durability, without the use of preservatives.
To avoid weathering, a clear or coloured coating can be applied to the timber, which will need to be re-applied every few years.
The right timber preservative and finishing will enhance the service life of the cladding and keep maintenance to a low, practical level.
Any questions?
Do you have any questions on timber cladding or want more information on the species of timber we supply? If so – don’t hesitate to get in touch today.
Likewise, if you think we’ve missed anything important or have any questions – be sure to fire us a tweet.
Image Credit: http://paintsandinteriors.blogspot.co.uk/2012/11/osmo-timber-cladding-picture-detail.html
